 |
|||||||||||||||||
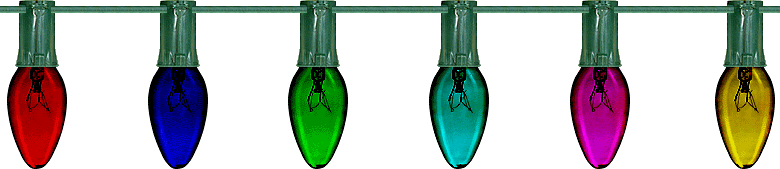
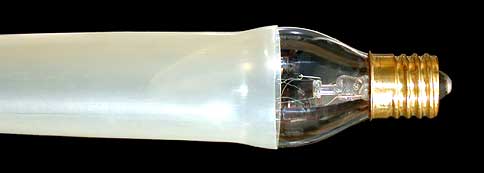
One Way To Install Christmas LightsIt can be (and usually is) very cold here in November & December, and every Christmas season many end up wishing they had put up their Christmas lights much earlier when it was still warm enough to do so without freezing. But I no longer have to worry about getting this yearly task done before it turns cold after solving the problem by installing my Christmas lights PERMANENTLY and now simply have to turn them on at the beginning of the Christmas season each year. My solution also solves several problems brought about by handling the lamps. First, most seem to prefer the bright, sparkly lamps which have a clear colored exterior film coating that water, from melted snow falling or blowing on to the warm lamps, usually penetrates, loosens and peals or flakes off when the lamps are taken down, reinstalled the following year and leaves partially bare, poor looking lights. Second, lamp filaments become very brittle and fragile with use and, even if handled very carefully, many lamps fail due to a broken filament and need to be replaced after being handled each year, but since installing several hundred Christmas lights permanently, only 4 or 5 lamps need to be replaced each year. Lamps don't last forever, of course, and every 5 or 6 years I replace all of them as they reach the end of their rated life and their color fades due to UV exposure from the sun. So how did I permanently install my Deck and Christmas lighting? Wood strips were cut from spruce or fir 2 x 4 and other various width scraps which were made true using a jointer and 1-3/8" thick x the required width + 1/8" using a thickness planner. Several strips were then half-lapped and glued together to form strips of the required lengths which were then thickness planed again, to 1-1/4" thick (length of lamp sockets) and to the required width, to remove any half-lapped glue joint imperfections. The strip for the garage soffit was nearly 30 feet long and, needless to say, a second person was required to help lift it into place as it would have broken from just its own weight, even without the added weight of the sockets and wiring present, if not supported at several points. The strip widths vary depending on where they are for. The strip width for the Deck/Christmas lights was made the same as the thickness as the deck roof 2x7 fascia so that, when finished, the lamp sockets would appear to have been installed within the edge of a 2x8 and the width of the surface mounted strip under the garage soffit was made 2". A router was then used to cut a 1/2" wide by 1/4" deep channel down the length of each strip, on the back side, to accommodate wiring. Then, even though lamp sockets are spaced every 12" on the wiring, 7/8" holes for installing the lamp sockets were drilled every 11-7/8" along the wood strip to provide the extra conductor length required where the wiring is split to accommodate mounting screws. Pilot holes were then drilled for the mounting screws and the router was used to put a 1/4" radius along the 2 front side corners of each strip. |
|
||||||||||||||||
|
|
|
||||||||||||||||
|
Building decks and porches can be a big project for DIY aficionados to tackle. If the job seems too big, you can hire a Home Advisor approved contractor to build it. The Home Advisor app connects homeowners with pre-approved Home Advisor contractors and builders.
|
|||||||||||||||||


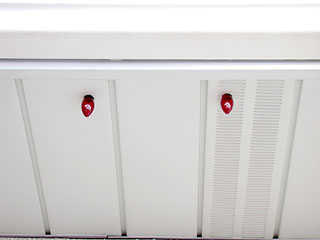
Since the deck was built 10 years ago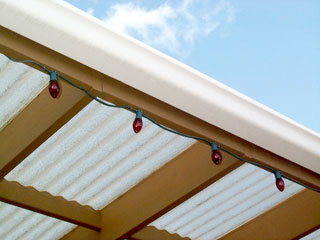 The Deck lights (which became Christmas lights at Christmas) had been simply stapled up, but the staples kept working loose, the wires were unsightly and the sockets had become brittle from exposure to the suns UV and were breaking. |
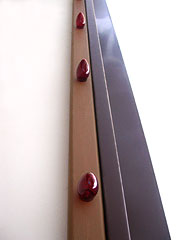
Now Neat & Tidy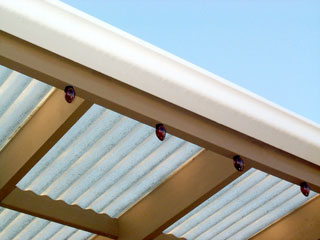 The sockets and wiring appear to be installed in the edge of a solid 2x8. |
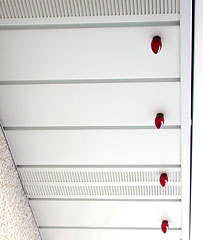
House & Garage Soffit Lights
 |
 |
 |
|
(Left & Center) Christmas lights with sockets & wiring installed above house aluminum soffit. |
||
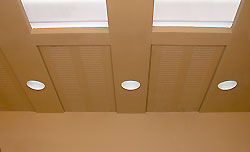
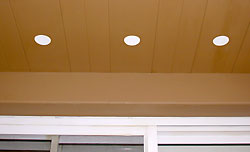
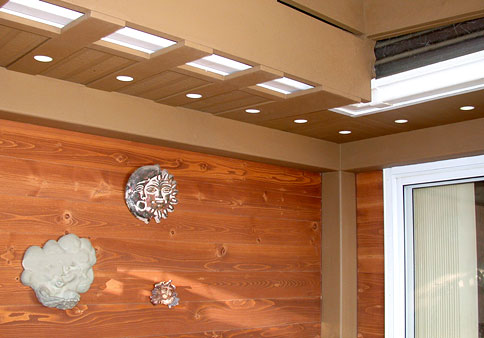
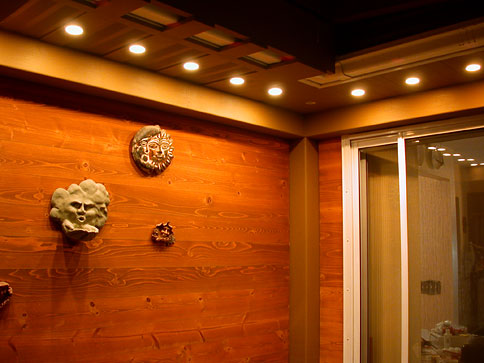
Deck Lighting
|
I have hundreds of 7-1/2 watt colored bulbs from before that got wet, "shed" their colored film, are perfectly good clear bulbs that were only used for one season and which were waiting to be used for something so I decided to make some home made deck lighting recessed pot light fixtures for them. |
||
 |
 |
 |
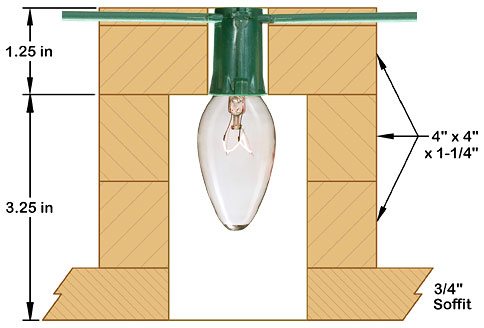 |
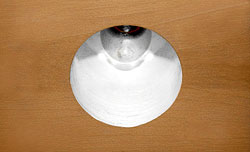
Three 4 x 4 x 1-1/4" wood blocks were glued together and to the 3/4" wood soffit piece associated with each fixture. A 2" dia. hole was then drilled through the soffit piece and 1st two wood blocks and a 7/8" dia. hole was drilled through the 3rd block for the lamp socket. A 1/2" wide x 1/4" deep channel cut in the top block accommodates wiring. The 2" hole was painted white inside and hot glue was used to secure the lamp sockets in place. |
|
|